
The Aussie and the Kiwi are telling two very different monetary policy stories right now, and the divergence is starting to show up clearly in the cross. The RBA held its cash rate at 4.35% in August, but the hawkish tone that once dominated has faded fast: Q2 inflation cooled to 3.9% from 4.1%, prompting Goldman Sachs to abandon its call for one final hike this year. Markets now price next to no chance of an August move, with only roughly even odds of a hike by November.
Across the Tasman, the RBNZ is playing a different game entirely. Having already hiked to 2.50% in June, the central bank has kept its guidance firmly hawkish, and markets are now almost fully pricing a further 25bp increase in September. Wednesday's employment data added an interesting twist: employment change q/q beat expectations sharply at 0.5% against 0.1% forecast, yet the unemployment rate also rose to 5.6% from 5.4%, above forecasts—a genuinely mixed print that complicates the otherwise hawkish RBNZ narrative.
The result: a Reserve Bank stepping back from further tightening against one still leaning hawkish, though now facing a labor market sending conflicting signals of its own.
Technical Analysis of AUD/NZD
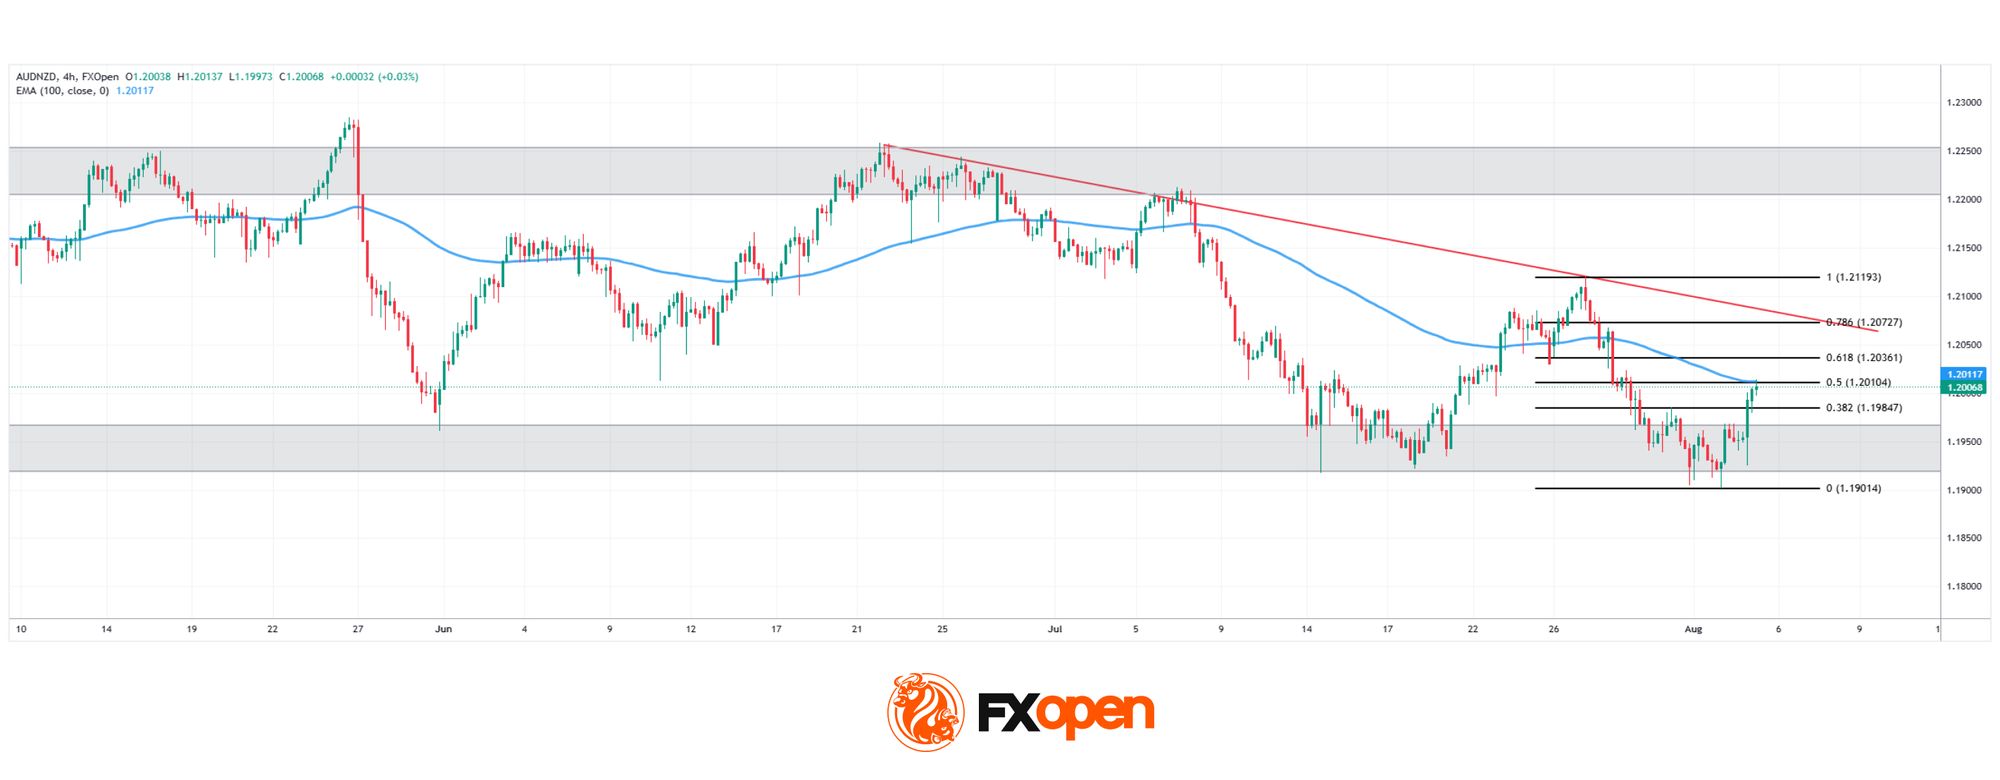
As AUD/NZD chart shows, the pair broke above the 100-period EMA back in July and is now testing this level again, right where it converges with the 0.5 Fibonacci retracement near 1.2011-1.2013. This confluence marks a critical juncture after weeks of steady decline.
Bullish Scenario
Should buyers break this EMA-Fibonacci confluence decisively, the path would open toward the 0.618 retracement near 1.2037, followed by the descending trendline, which itself converges with the 0.786 level around 1.2073. A break above this second confluence would leave room to retest the 1.2200-1.2250 resistance, the upper boundary of the broader range that has trapped price since April..
Bearish Scenario
Conversely, a rejection at the EMA-0.5 confluence would send price back down to retest the 1.1900-1.1950 support, the level that has held since March.. This is the real test: a confirmed break below it would open the door to a more sustained and decisive downtrend.
With price wedged right at this pivotal confluence, and the broader March-to-August range still very much intact, AUD/NZD looks ready to decide whether it's building toward a genuine breakout, or simply setting up for another rejection within its months-long range.
[LINE][/LINE]
 Start testing FXOpen ECN account at fxopen.com/en/trading-accounts/


